Bubble Payment Kit
These documentation site will teach you how to use bubble payment kit on your project
Getting Started
Bubble payment kit is a frontend library that runs using web component shadow DOM technology. Therefore you have to always make sure that you handle old browser user experience well.
You can check shadow DOM support in this website : https://caniuse.com/#feat=shadowdomv1
Installation
There are several ways to install bubble payment kit on your project.
Easy Installation :
you can copy paste this code snippet on <head> tag in your index file.
<script>!function(){var e=new XMLHttpRequest;e.open("GET","https://bubble-payment-kit.staging-achilles.systems/include_js.php"),e.onload=function(){if(200===e.status){var t=document.createElement("script");t.setAttribute("src","https://bubble-payment-kit.staging-achilles.systems/"+e.responseText),t.defer=true,document.body.appendChild(t)}},e.send();var s=new XMLHttpRequest;s.open("GET","https://bubble-payment-kit.staging-achilles.systems/include_css.php"),s.onload=function(){if(200===s.status){var t=document.createElement("link");t.setAttribute("href","https://bubble-payment-kit.staging-achilles.systems/"+s.responseText),t.setAttribute("rel","stylesheet"),document.head.appendChild(t)}},s.send()}();</script>
But please be aware that you have to replace https://bubble-payment-kit.staging-achilles.systems according to your environment. Therefore this method is quick yet you still have homework to do.
This easy installation guide should only be used for quick testing purposes. For long term usage of Bubble Payment Kit, please refer to the Recommended Installation guide below.
Recommended Installation :
- On your Google Tag Manager dashboard, select
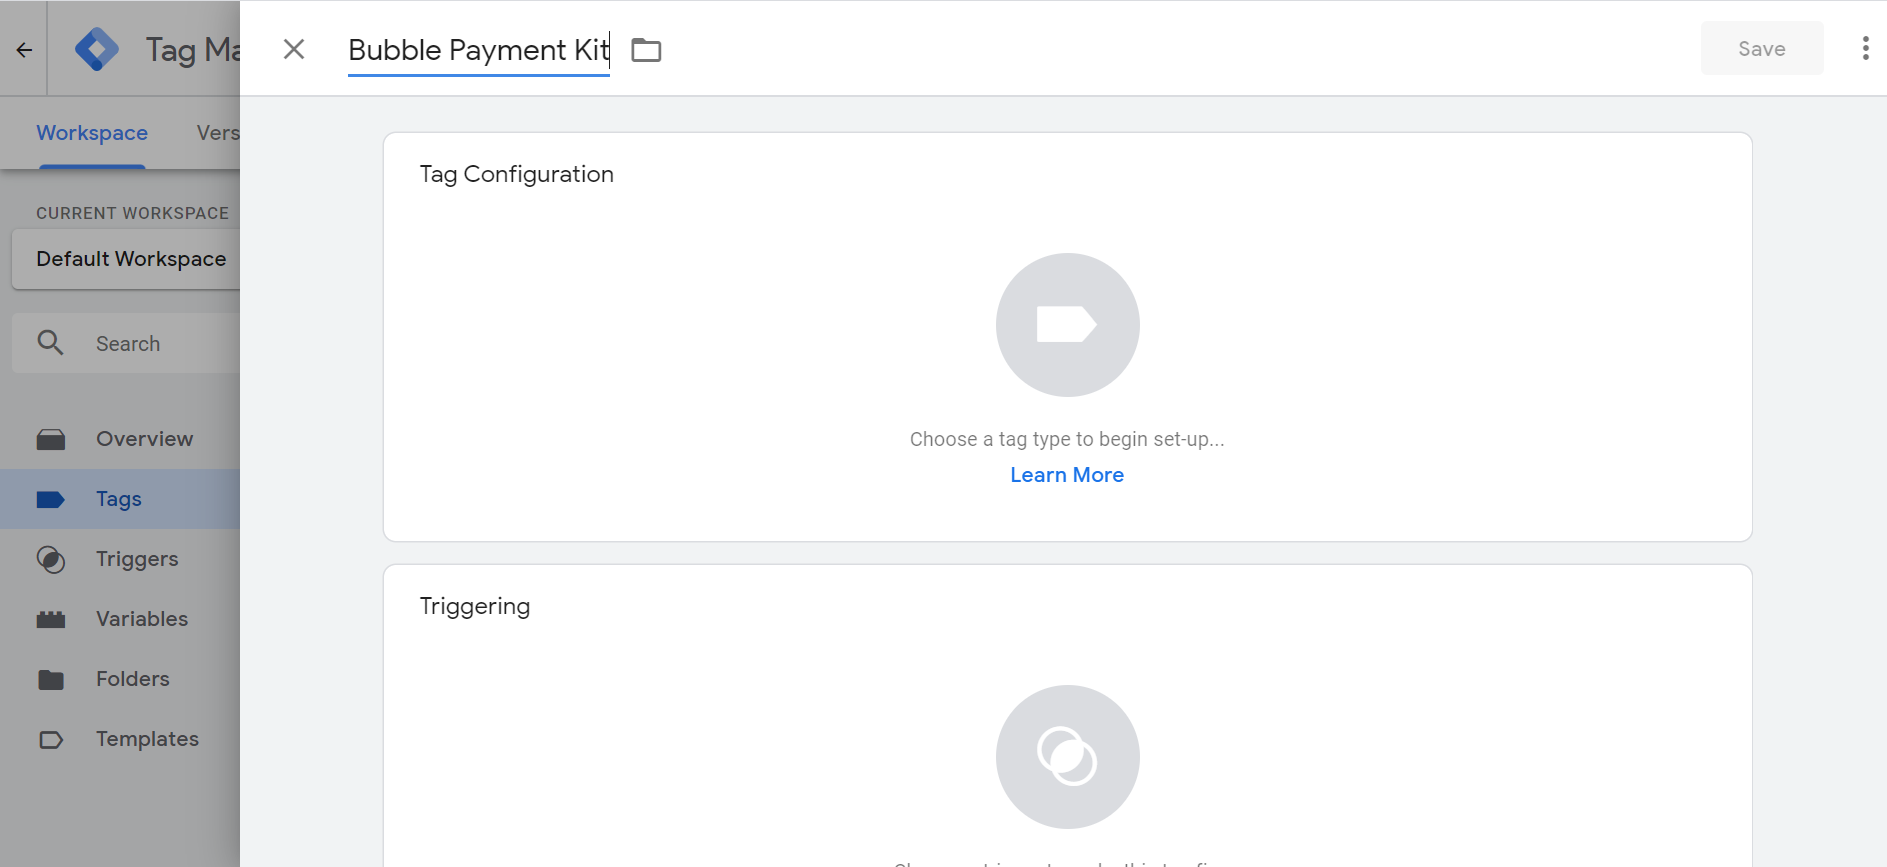
Tagson the left menu and clickNewto create a new tag. Then, give your tag a name. - On
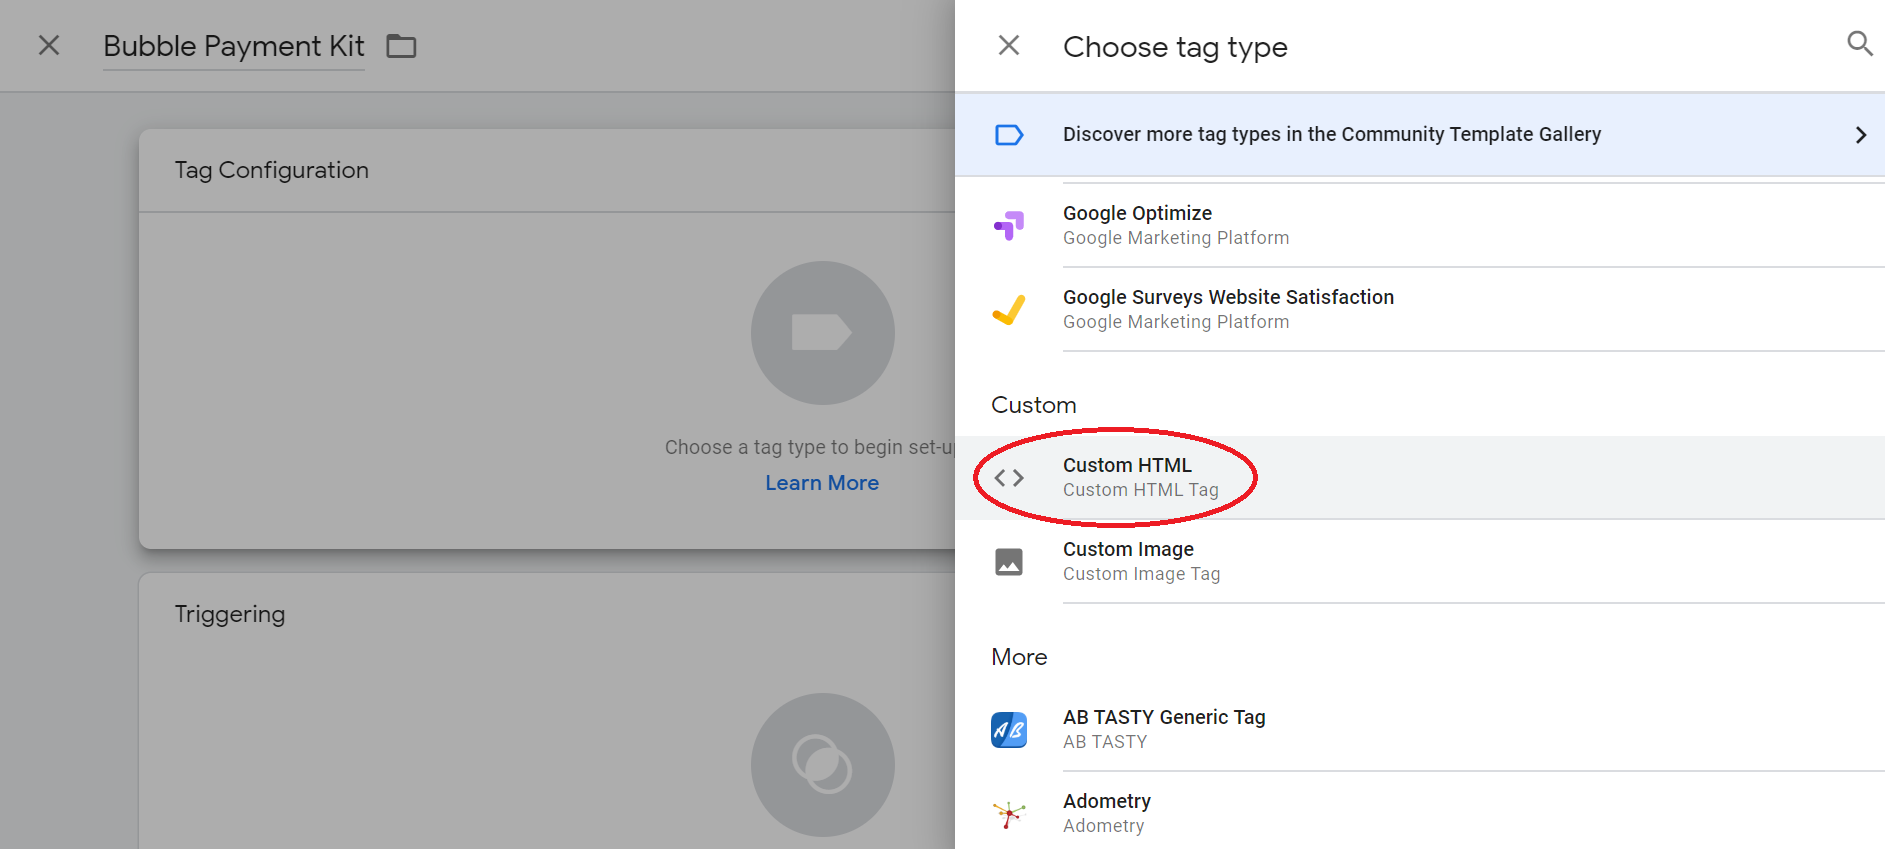
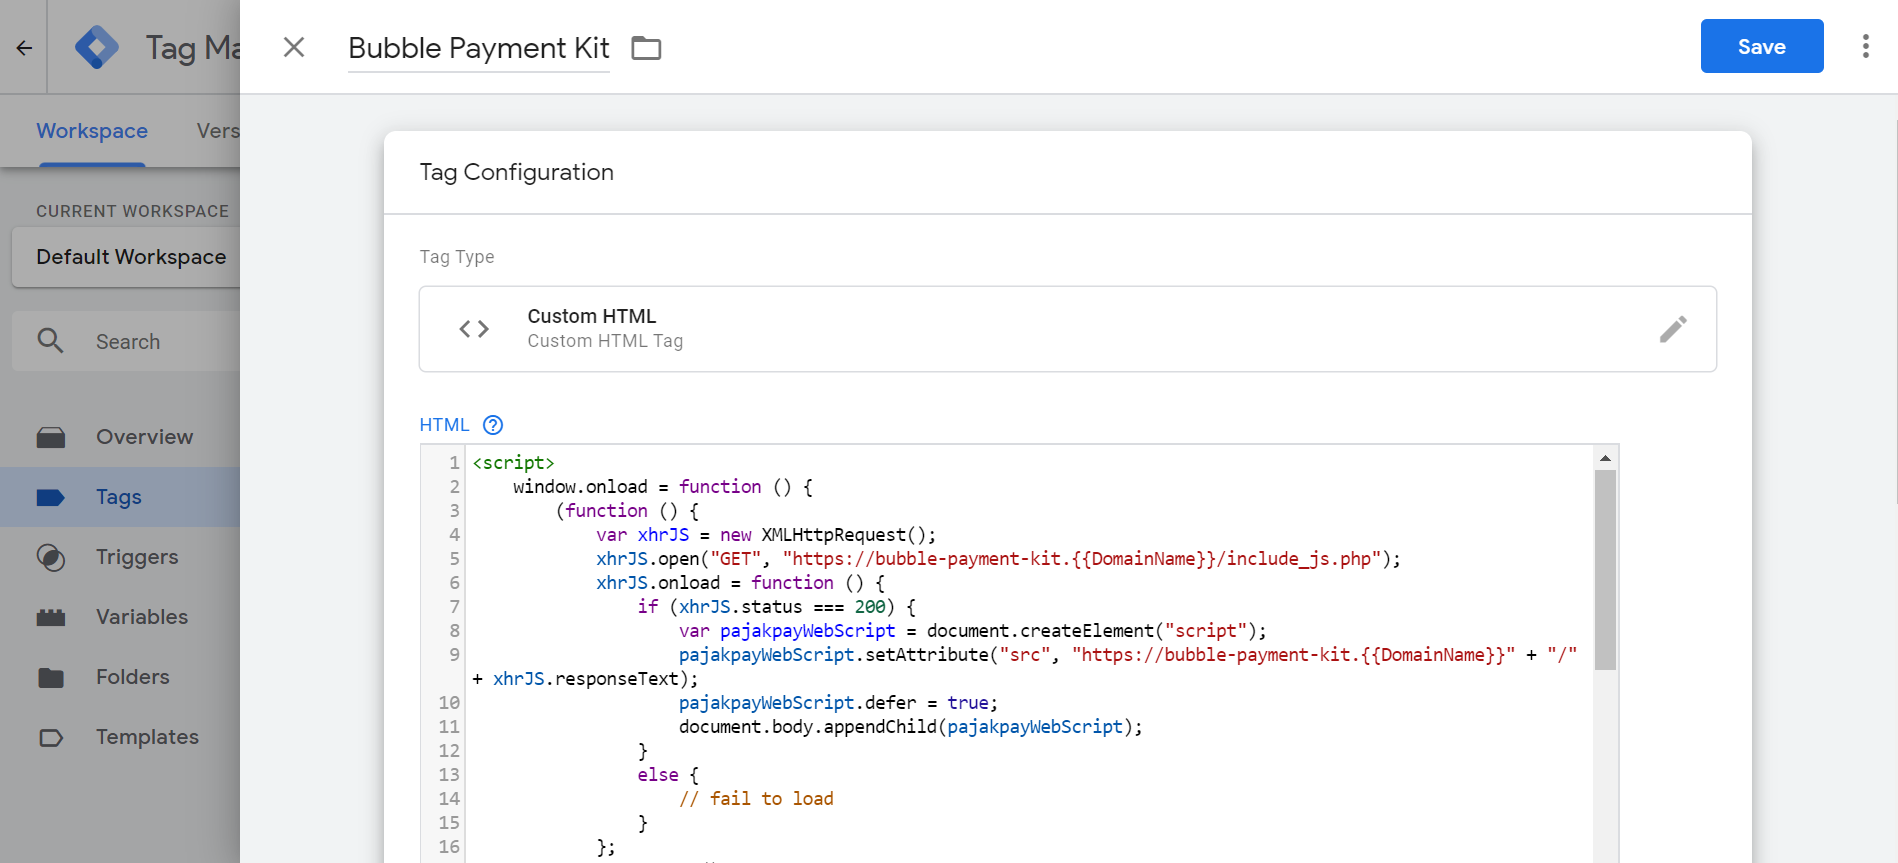
Tag Configuration, chooseCustom HTMLas your tag type. - Paste the following code snippet into the HTML block as shown. Note that the code snippet uses Google Tag Manager's User-Defined Variable
DomainNameto configure our endpoint according to your environment. Hence, you will need to set up a User-Defined Variable later as shown in steps 5-7. This way, you will be able to load the right snippet according to your active environment (staging,demoorproduction). Do make sure that the following code snippet is enclosed with<script></script>tag when pasting it into the HTML block.
<script>
    window.onload = function () {
        (function () {
            var xhrJS = new XMLHttpRequest();
            xhrJS.open("GET", "https://bubble-payment-kit.{{DomainName}}/include_js.php");
            xhrJS.onload = function () {
                if (xhrJS.status === 200) {
                    var pajakpayWebScript = document.createElement("script");
                    pajakpayWebScript.setAttribute("src", "https://bubble-payment-kit.{{DomainName}}" + "/" + xhrJS.responseText);
                    pajakpayWebScript.defer = true;
                    document.body.appendChild(pajakpayWebScript);
                }
                else {
                    // fail to load
                }
            };
            xhrJS.send();

            var xhrCSS = new XMLHttpRequest();
            xhrCSS.open("GET", "https://bubble-payment-kit.{{DomainName}}/include_css.php");
            xhrCSS.onload = function () {
                if (xhrCSS.status === 200) {
                    var pajakpayWebCss = document.createElement("link");
                    pajakpayWebCss.setAttribute("href", "https://bubble-payment-kit.{{DomainName}}" + "/" + xhrCSS.responseText);
                    pajakpayWebCss.setAttribute("rel", "stylesheet");
                    document.head.appendChild(pajakpayWebCss);
                }
                else {
                    // fail to load
                }
            };
            xhrCSS.send();
        })();
    }
</script>
- On
Triggering, choose a trigger to activate the tag. ClickSaveto create your tag. - Select
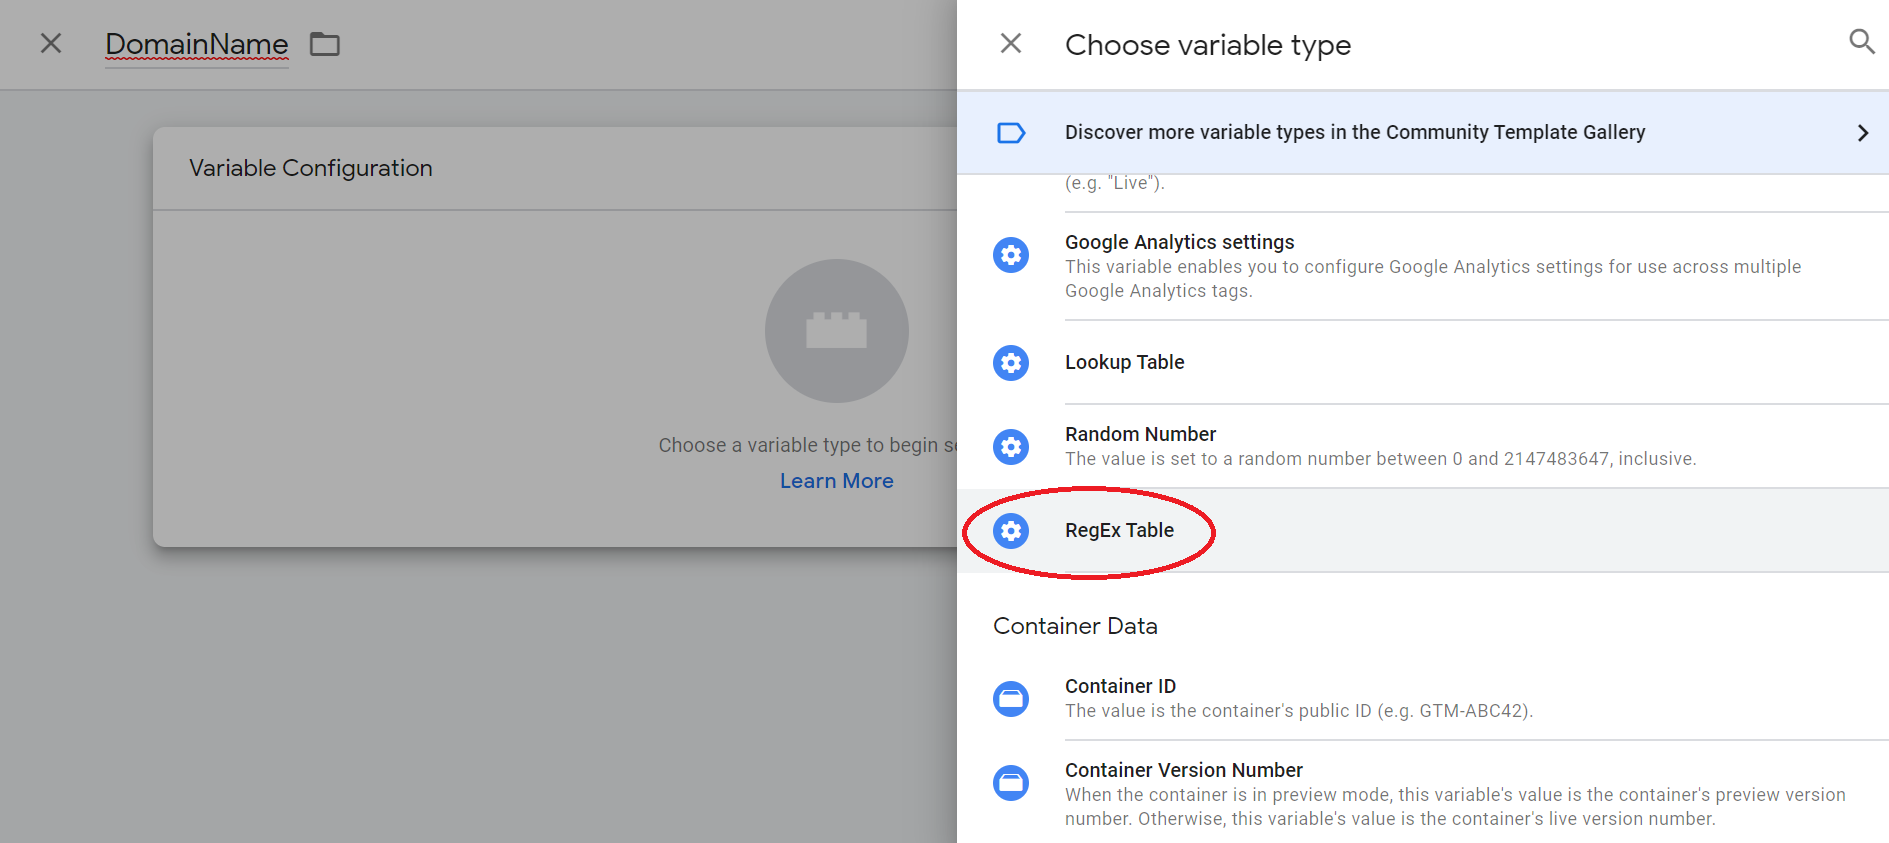
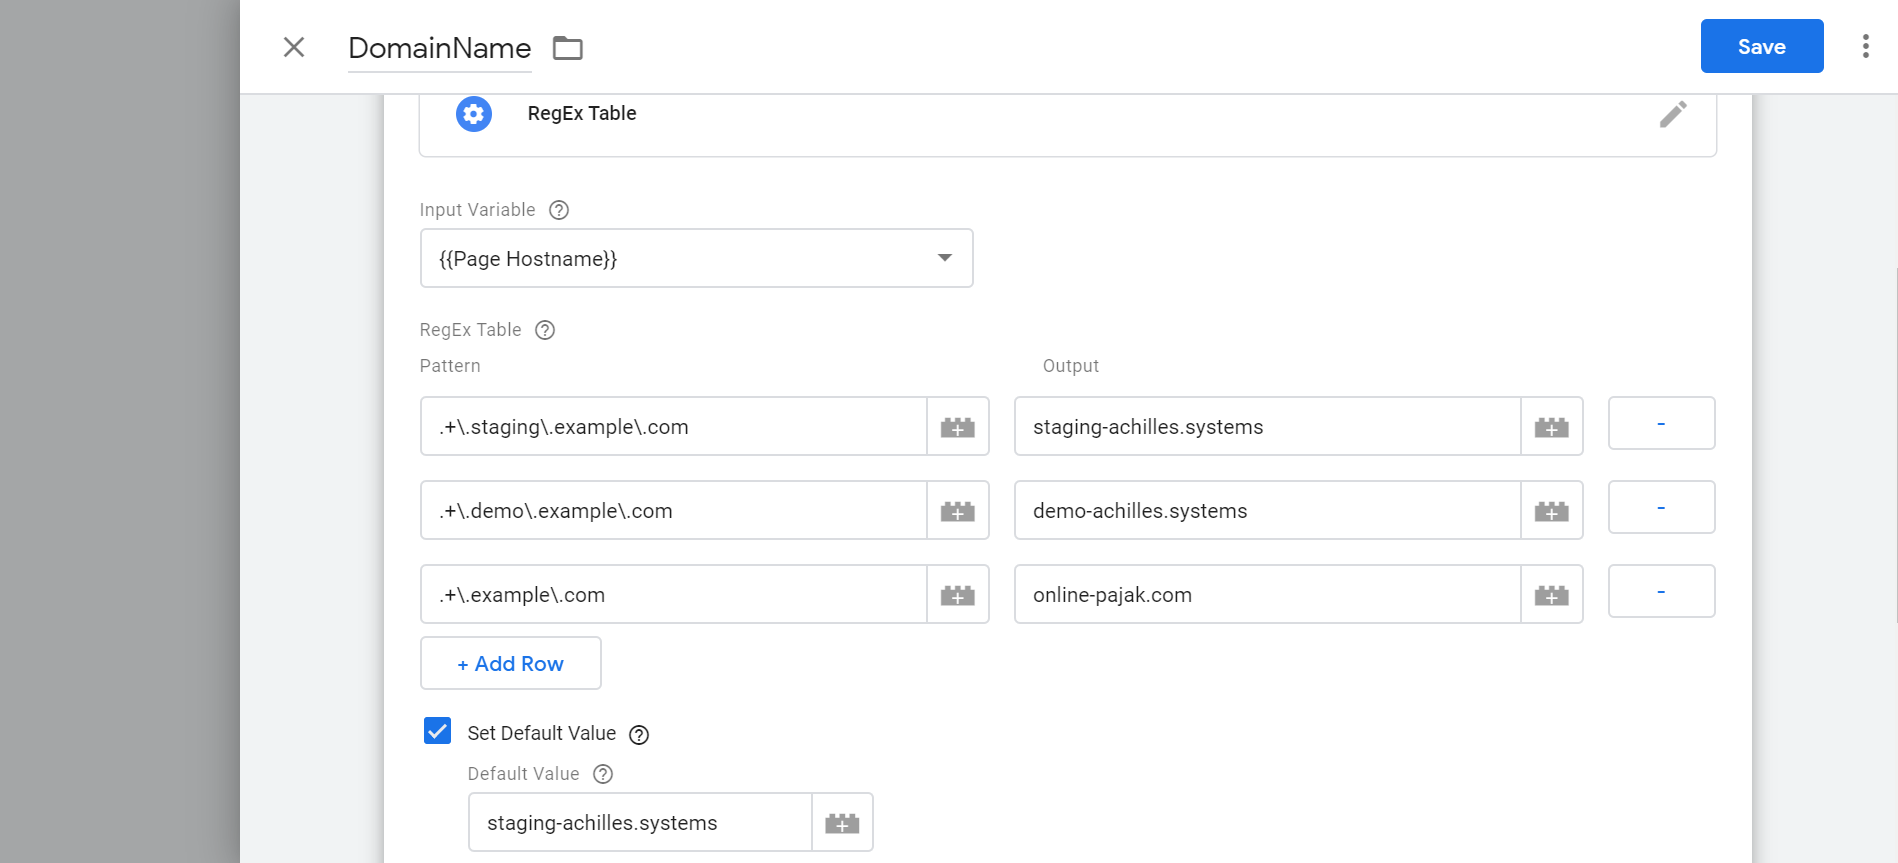
Variableson the left menu. Scroll down to User-Defined Variables and clickNewto create a new variable. Make sure to give the same variable name (i.e.DomainName) that was referenced in the HTML block in step 3. OnVariable Configuration, chooseRegEx Tableas your variable type. - Choose
{{Page Hostname}}asInput Variable. Then, add regex patterns to match yourstaging,demoorproductionhostnames with our domain names. In the example image below, if your hostname isshop.staging.example.com, the value ofDomainNamewill bestaging-achilles.systems. You can also set a default environment to be used as domain name when no match is found. - Click
Saveto create your variable. Your tag is now ready to be used.
Instant tax payment pop up
To proceed with a instant tax payment process, you must initialize a taxPaymentKitPopup object by providing an instantPaymentInfo object as parameter beforehand. You can do this by calling :
window.taxPaymentKitInit(instantPaymentInfo, lang, callback);
After initialization you can call the pop up by calling :
window.taxPaymentKitPopup.open();
After initialization, take notes that kap, kjs, npwp and taxPeriod cannot be modified, since it will render a disabled read only input. If you need to change one of the parameter you need to reinitialize taxPaymentKitPopup object and reopen the pop up to apply the changes.
Tax Payment Popup (powered by tingle)
Our tax payment pop up is powered by third party library called tingle.js. Therefore if order to control the popup programmatically, you can refer to tingle API : https://tingle.robinparisi.com/
Parameters
An instantPaymentInfo object should be passed as a parameter to the taxPaymentKitInit() function. The object should consist of the following attributes:
| Attribute name | Type | Value Example | Mandatory |
|---|---|---|---|
| kap | Number | 411121 | yes |
| kjs | Number | 100 | yes |
| npwp | String | 00.999.999.9-016.000 | yes |
| taxPeriod | Object | yes | |
| taxPeriod.start | String | 01/2020 | yes |
| taxPeriod.end | String | 12/2020 | yes |
| amount | Number | 10000 | no |
| revision | Number | 0 | yes |
Second parameter lang string is provided to indicate language to be displayed on initialization of the pop up. Only two choices are available: "en" or "id", for English or Indonesian. Default is set to "id".
Callback function
Callback function is passed on initialization and will be replaced when popup is reinitialized. This callback is called whenever pay button inside the popup is clicked. Therefore you can use whatever information that is passed inside the callback.
callback = function(taxPayment, error) {
    if (error) {
        // error occured while saving tax payment
        // Object structure
        // error.message - String
        // error.code - Integer
    }

    var taxPaymentId = taxPayment.id;
}
window.taxPaymentKitInit(instantPaymentInfo, lang, callback);
